Category Archives: Low cost Lunches

Home made tortilla recipe

Melissa making gluten free tacos
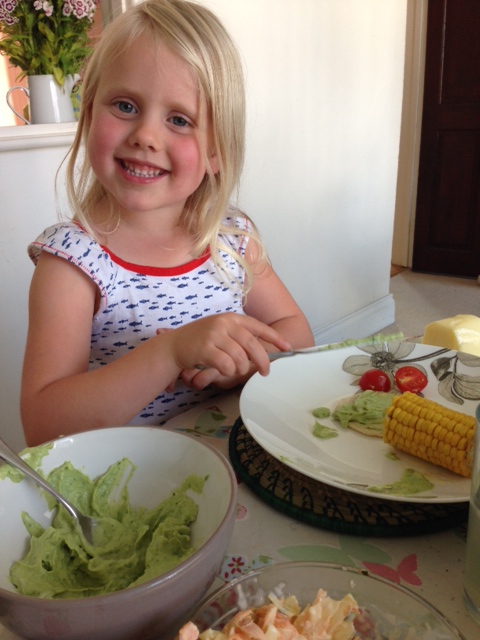
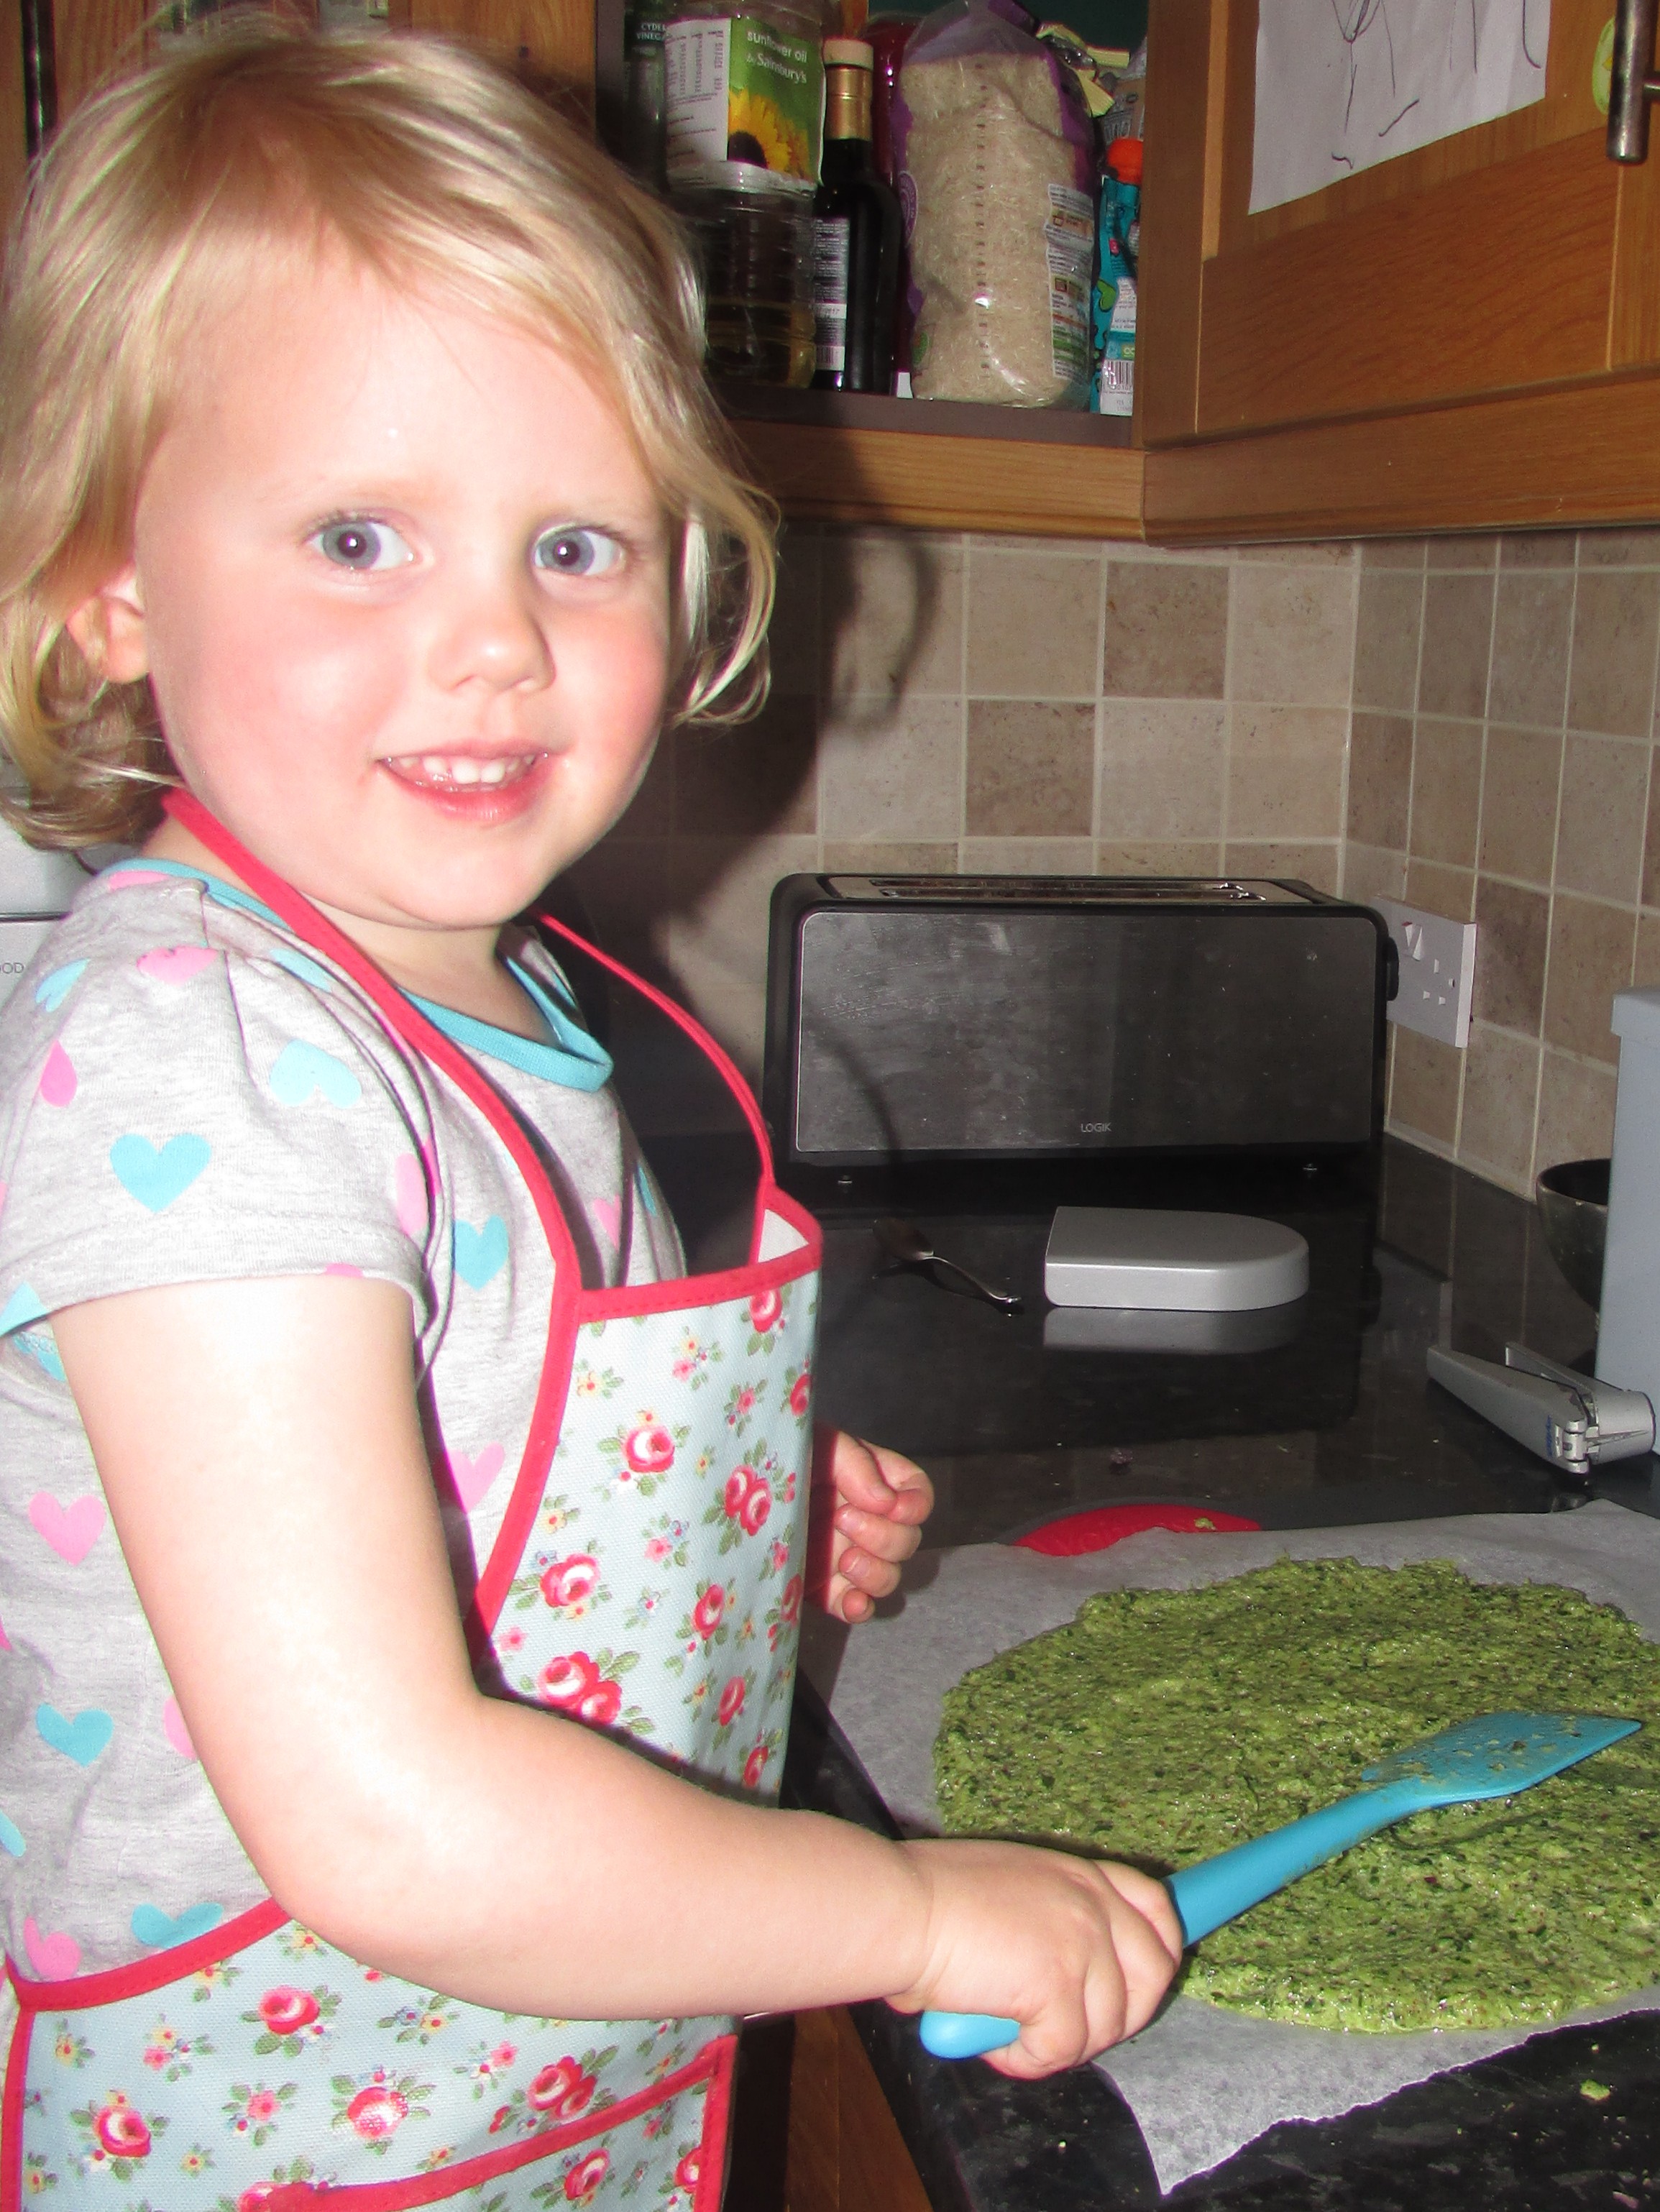
Tortillas are such a flexible meal for the family. You can whip them up in 2 minutes and you’ll never buy shop bought again! They are perfect for a picnic lunch and used as a wrap with your favourite fillings. My daughter loves to make them, placing each dough ball in the cast iron press and making perfect little rounds.

I bought my cast iron press from Mexico – via E-bay – it really wasn’t expensive. It’s great for entertaining guests as makes good party food. Here’s the recipe:

  • 2 cups all-purpose flour (if you’re gluten free use Masa Harina – Mexican corn flour)
  • 1/2 teaspoon salt
  • 3/4 cup water
  • 3 tablespoons olive oil

    In a large bowl, combine flour and salt. Stir in water and oil. Turn onto a floured surface; knead 10-12 times, adding a little flour or water if needed to achieve a smooth dough. Cover, and let rest for 10 minutes in the fridge.

    Melissa eating gluten free tacosDivide dough into 12 portions, and roll each portion into a little ball. I use a tortilla press, but you can easily use your hands or a rolling pin. On a lightly floured surface, roll each portion into a disk. In a large non-stick skillet cook the tortillas over medium heat for 1 minute on each side or until lightly browned. NB/ You don’t need any oil to do this.
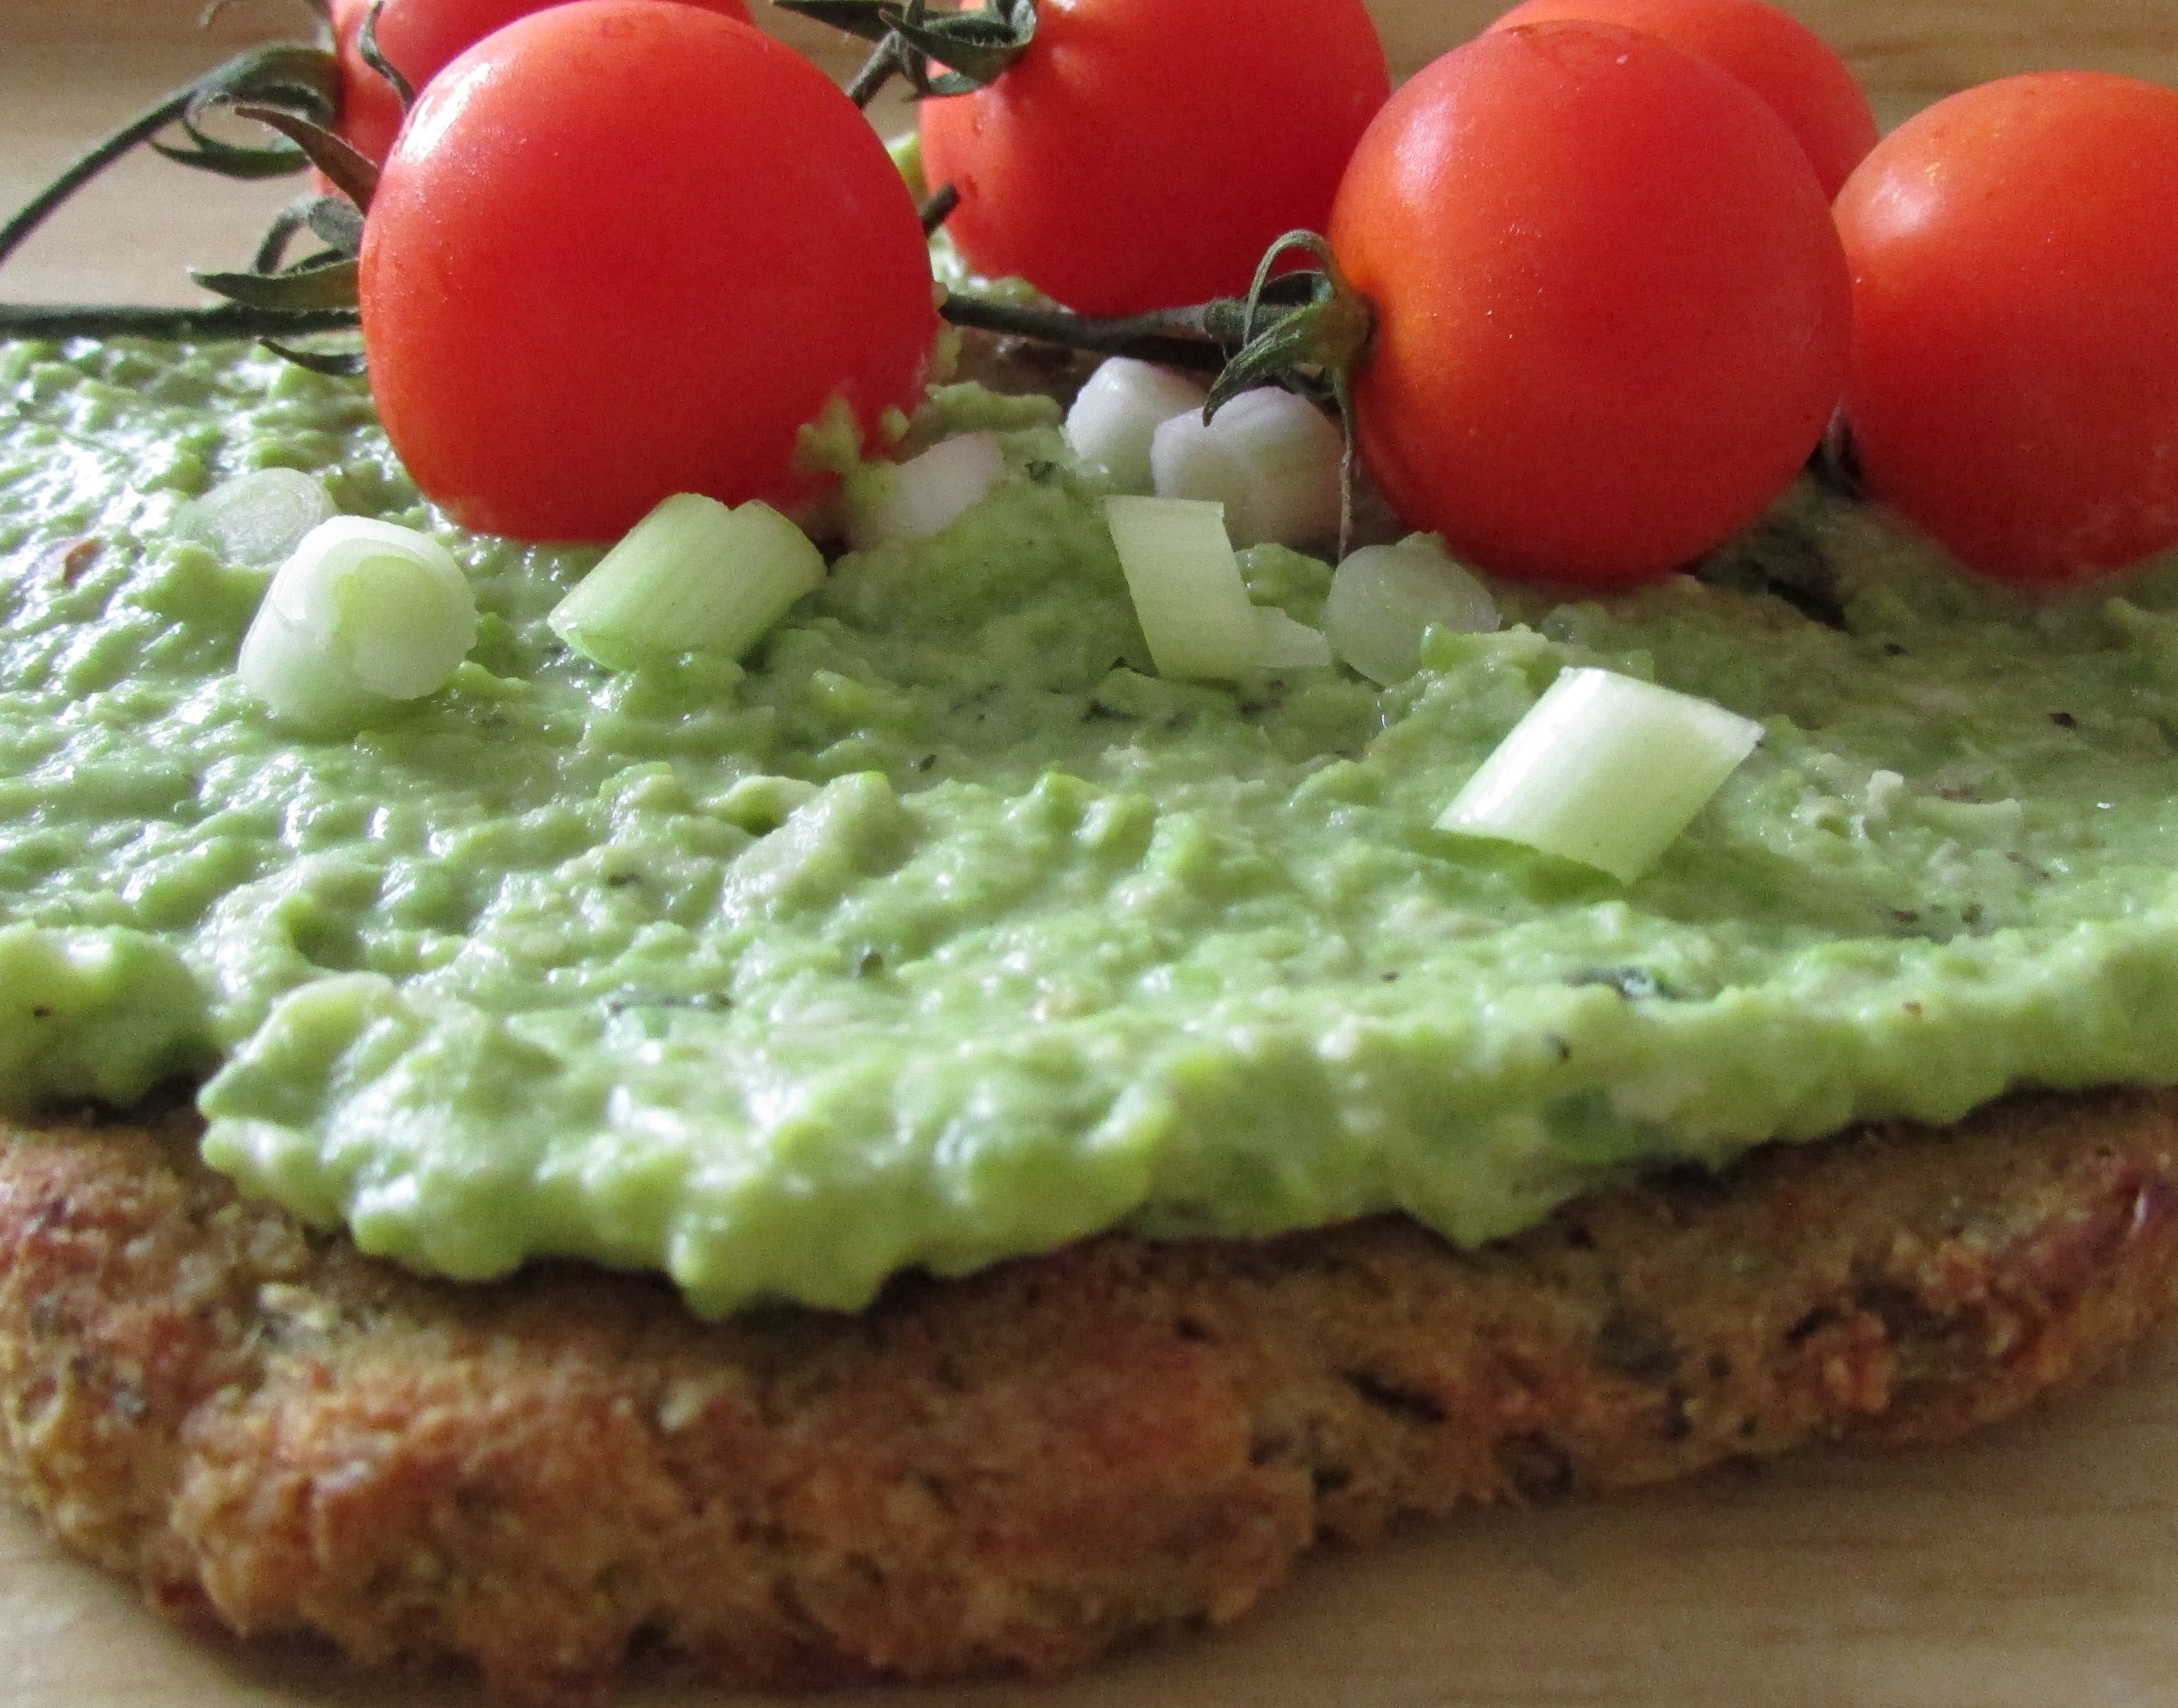
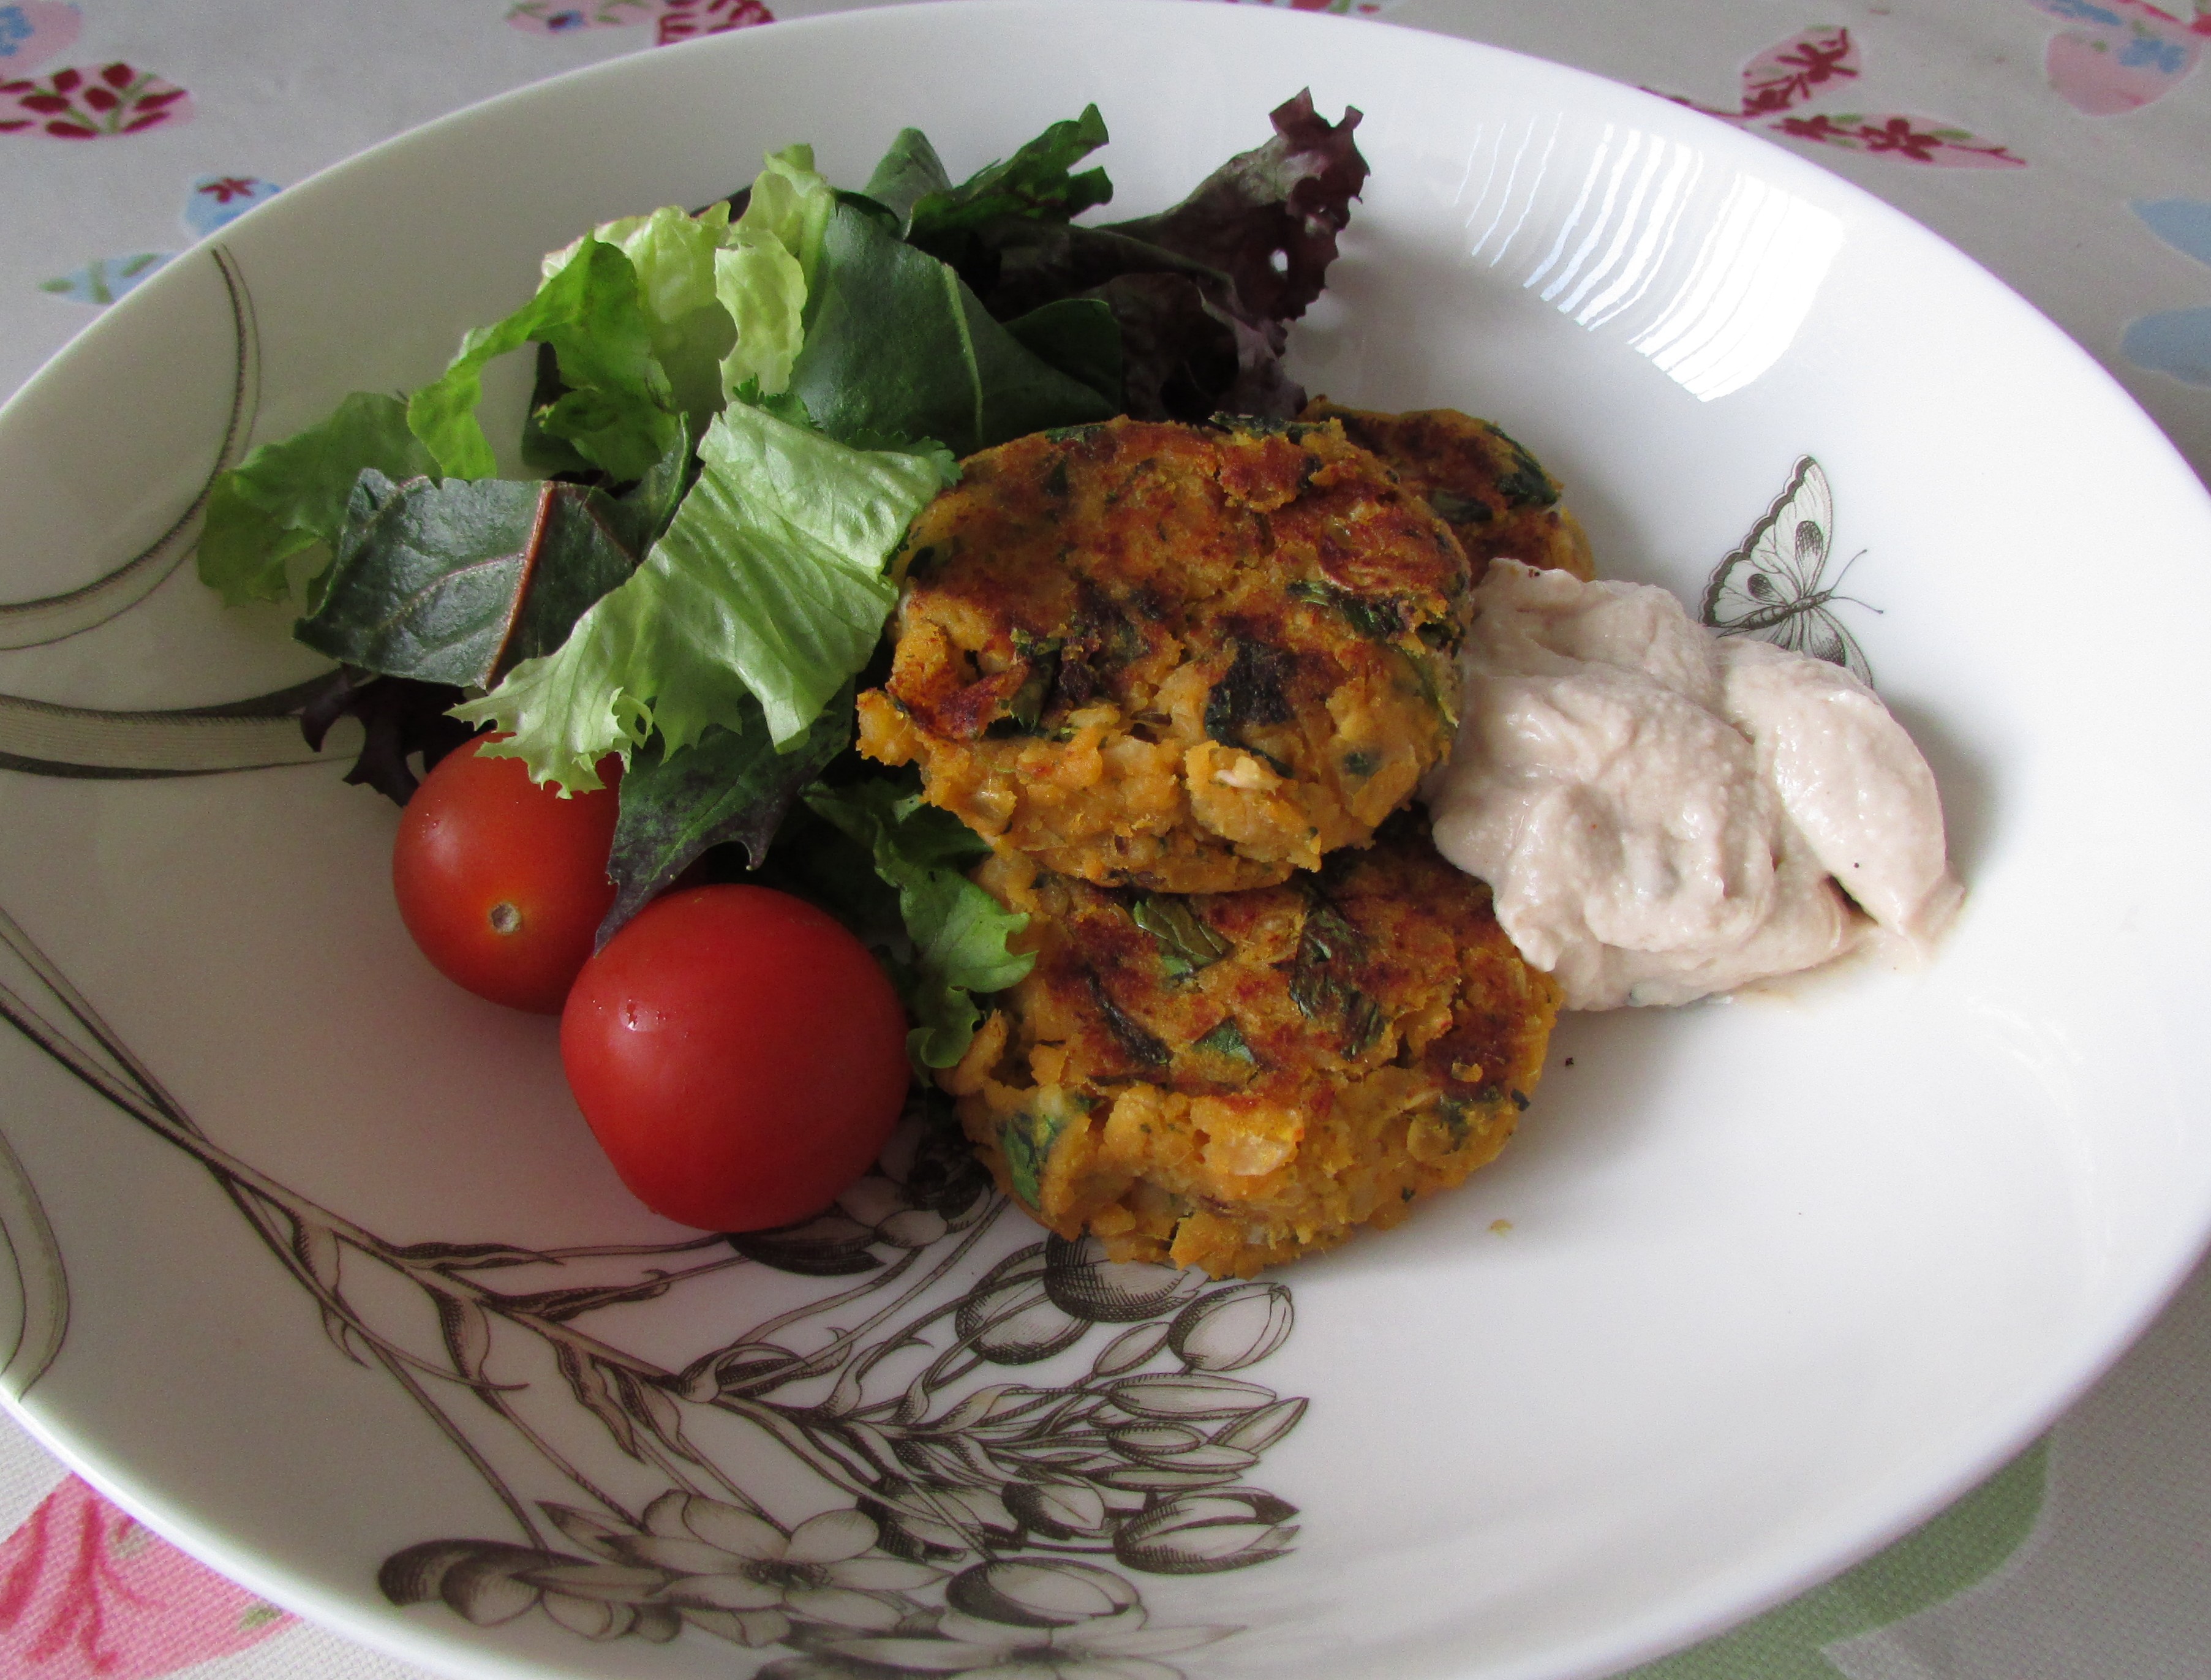
    Serve with whatever filling you like. (I did a pulled pork, salsa and guacamole for Father’s day, but you could easily do re-fried beans and cheese for a delicious frugal lunch.


Beetroot and feta burger

Beetroot and feta burgerWe like to make a concious effort to eat less meat and more vegetable, but we do love a burger. So I thought I’d create a healthy meat-free burger that we could all enjoy. This week in the veggie box I got a bunch of beetroot.

Beetroot comes into season around this time and you can pick your own at Medley Manor Farm.

Usually I’d make beetroot into chocolate fairy cakes (see recipe here), but I thought for a change I’d make a dinner savoury delight. Beetroot’s are packed full of vitamins, minerals and protective antioxidants demonstrated by their beautiful colour. This recipe is super easy and can be whipped up in less than 5 minutes. Instead of a bun you can also use lettuce leaves, or get the mini buns for when you’re entertaining others children.

Here’s the recipe; Take a 150g tin of chickpeas, drain and mash them (or soak and cook your own – it’s much cheaper!). Add 200g of grated beetroot, 100g of flour (any flour works – for gluten free try rice or chickpea flour), 100g of crumbled feta, two eggs, 1 tbsp of horseradish sauce and handful of chopped coriander. Combine all the ingredients thoroughly in a bowl and then portion them into 4 burgers (or 8 little burgers for kids) with your hands. Grill the burgers for 5 minutes on each side and serve with a dollop of hummus or mayonnaise and some salad. Healthy and delicious!

Leftover veg Flat bread with Broad bean Mash

Leftover veg flatbread and broadbean mashThis recipe is perfect picnic food. Early Summer Broad beans make a lovely healthy dip and a good alternative to hummus that children and adults love. Plus the bread can be made by using any sad looking vegetables that have been forgotten at the back of the fridge. I used a savoy cabbage that I’d lost inspiration for, but you could easily use spring greens, beetroot, carrots or parsnips instead.

Cabbage has been touted as one of the worlds healthiest foods! It contains cancer fighting properties as well as the ability to lower cholesterol. Although it may make some people a bit windy, the juice of a cabbage has shown to cure stomach ulcers. We should all be including it in our diet every week.

For this recipe take 250g of grated cabbage (or any vegetable you prefer). Squeeze out as much moisture as possible and add 80g of plain flour, 1 egg, 1 tbsp of sunflower seeds, 30g of soft cheese and 2 tbsp of freshly chopped herbs from the garden such as rosemary, thyme or parsley.

Once combined, split the dough into 6 parts. Line a tray with baking paper, take a piece of dough and squash it onto the baking paper with a spatula or your fingers until it is a flat bread shape. Do this with 2 other pieces of dough and bake in the oven for 20 minutes on gas mark 5, 190C, 375F until golden brown.

Repeat with the last 3 pieces of dough. In the mean time shell 3 cups of broad beans, steam them for 5 minutes and blend them with a clove of garlic, some lemon juice, olive oil and salt and pepper. When done, allow the bread to cool a little and serve with the Broad bean mash, some spring onions and cherry tomatoes. Delicious! Or store in the fridge and pop in the toaster when you’re ready to eat it.

Asparagus ENDS – mini quiche

Asparagus endsIt always make me sad when the asparagus season comes to an end. We’ve been picking our own from Rectory Farm at every opportunity. But there are many other PYO’s in Oxfordshire doing the same and all of them are worth a visit – read more on that here.

Towards the end of the season the asparagus ends begin to get tough. Not one for throwing things away I’ve been thinking about a recipe I could devise that uses up these delicious and nutritious ends that would have previously gone in the bin. I found that if you chop them up finely and sauté them in a little butter with onion and garlic, that they make a delicious quiche filling. If you got any leftover cheese – a scattering on top really makes these mini mouthfuls a wonderful summers picnic treat.

Here’s the recipe which makes 12 mini quiches

Asparagus ends mini quiche2oz/50g butter
4oz/100g plain flour
2fl oz milk
2 eggs
1 small onion
1 garlic clove
10 asparagus ends
50g cheese, grated
Water

Method – Rub together the butter and flour until it resembles breadcrumbs. Add a few tsp of water and combine until you have a nice ball of pastry. Cover with cling film and put the pastry in the fridge to chill for about 10 minutes.

Slice the asparagus ends into small disks and gently fry in a little butter or olive oil with a finely chopped white onion and some crushed garlic. This should take about 5 minutes. In a jug, whist the eggs and milk together and season with salt and pepper. Grate the cheese.

Roll out the pastry very thinly on a floured surface. Cut out circles from your pastry large enough to fit the muffin tin. Using some extra butter, grease your tins, and then sprinkle on a little flour. Gently press in a circle of pasty in to each space.

put a tsp of grated cheese at the bottom of each one. then add a little of the asparagus / onion filling. Now fill up the cases with the egg and milk mixture.

Cook for 12 – 15 minutes on 220C, 350F or Gas Mark 7. Allow to cook before removing, then serve with a fresh leaf salad. Yummy!

Sweet Potato Falafel

These tasty morsels are deliciously wholesome and cheap to make. They are the perfect Summer picnic lunch or evening family meal. Jazz them up with a wholemeal pitta, salad and some mint and yoghurt dressing and kids will love them too.

Sweet potato falafel with tahini dressingHere’s the recipe

400g cooked chickpeas (1 can)
250g baked sweet potato (about 2 medium)
Juice from 1 lemon
2 cloves of garlic
2 handfuls of spinach
2 tsp cumin
1 handful of chopped fresh coriander or parsley
Salt and pepper

Bake the sweet potatoes whole until soft and tender (around 40 minutes). I soak my chickpeas over night and boil to cook, but you can also use a tin for ease. Bash the cooked baked potatoes and the chickpeas with a potato masher until roughly combined.

In a frying pan, cook the garlic in a little olive oil and then add the cumin and the spinach plus a dash of water. After a few minutes, when the spinach and garlic have cooked and you can smell the aroma from the cumin, remove from the heat and add to the sweet potato and chickpea mash mixing thoroughly.

Season with the lemon juice, salt, pepper and chopped coriander. Taste to make sure you’re satisfied with the flavour. Now form the dough into balls – I made 17 with this quantity. You can place the falafel on a lined baking tray, pressing it down ever so slightly, and bake in the oven for 20 minutes (gas mark 6). Or if you prefer them crispy like me, fry in a little olive oil for a couple of minutes on each side.

Serve with Tahini and yoghurt sauce made by mixing 2 tbsp of natural yoghurt with 2 tbsp of tahini (peanut butter works well here too), a crushed clove of garlic, 1 tsp of tomato ketchup, salt, pepper and chopped fresh mint. Summer heaven.

These beautiful cauliflower leaves usually end up in the bin

Leftover cauliflower leavesUnless you own a rabbit, these beautiful cauliflower leaves usually end up in the bin. But next time you’re making a cauliflower cheese don’t trough the leaves away. Instead buy a cauliflower that hasn’t been trimmed and try out this tasty and economical soup.

Here’s the recipe:
Take the outer leaves from two medium heads of cauliflower and roughly chop them. Arrange them on a baking tray with some par-boiled parsnips, potatoes or carrots – basically whatever you have in the fridge that needs using up.

Roasting cauliflower leaves for soupPlace a couple of cloves of garlic in the baking tray and sprinkle with salt, pepper and herbs of your choice. I like to use thyme and oregano sometimes, but also love a sprinkling of garam masala and a couple of chilli’s depending on my mood. Roast on a medium heat for 30 minutes until the vegetables are caramelizing nicely.

Whilst the vegetables are roasting, sauté a white onion in 25g of butter. Add 2 pints of vegetable or chicken stock, and if you’ve got any, the leftover rind from a Stilton or Parmesan cheese. I also like to through in some the rind of half a lemon – as this intensifies the flavour of the cheese and vegetables. Simmer everything together for 30 minutes.

Cauliflower leaves and cheese soupOnce the vegetables are roasted and the stock has had time to simmer, squeeze out the contents of the roasted garlic and add it and the vegetables to the stock. Remove the rind, and lemon skin (or what is left of it) and blend everything into a smooth soup. Serve with home made bread. Delicious and beautifully economical.

Ever wondered what to do with leftover broccoli stems?

Food waste broccoli stemsEver thought what a waste it is to throw away broccoli stems? Well this recipe will change you outlook of your food waste bin for ever! It is phenomenal.

Also, for anyone that is gluten free or just wants to be healthy but misses the satisfaction of biting into a pizza this is the recipe for you. I make it frequently for the family and everyone agreed; it’s better than real pizza!

broccoli pizzaPlus broccoli (or cauliflower which works very well too) is high in vitamin C, antioxidants and anti-inflammatory compounds such as Indole-3-carbinol, research suggests that is has cancer and heart protective properties.Furthermore, it’s actually really simple to make.

Here’s the recipe – Basically grate 2 or 3 discarded broccoli or/and cauliflower stems then boil the gratings for 5 minutes, drain and squeeze out all the water in a tea towel or muslin/cheese cloth. You want the pulp to be extremely dry so that when it cooks it crisps up.

Now mix in one egg and 100g of cream cheese. Divide and press flat onto a baking tray lined with baking paper. Bake for 30 minutes until golden brown. Whilst the pizza base is cooking you could use the time to make a passata tomato sauce with a tin of tomatoes, a clove or garlic, some chopped onion, salt and pepper.

cauliflower pizza 2Once the base is cooked and crispy, add the toppings of your choice and bake for a further 10 minutes. Serve with salad.

TOP TIP: If you’re a fan of juicing, this would be an excellent way to use up all the discarded vegetable fibre from your juice machine.

Beetroot soup with horseradish cream (63p per portion)

beetroot soup with horseradish creamEveryone’s got a jar of horseradish at the back of the fridge, waiting for a roast. However, if you see it going off, here’s the perfect way to use it up. Beetroot’s earthy sweet and vibrant flavour is the best accompaniment. Beetroot are packed full of vitamins, minerals and protective antioxidants demonstrated by their beautiful colour.

This recipe is very easy to prepare and also very cheap. It’s adapted from Hugh Fearnley-Whittingstall’s excellent River Cottage Veg Every Day book. I didn’t have a kilo of beetroot so halved the recipe and added some carrots instead that were fresh from our North Aston veggie box.

Take 250g of fresh beetroot and 250g carrots. Scrub them clean, slice into chunks, then place them in roasting tin with a few cloves of garlic, some thyme, salt and pepper and a drizzle of olive oil. Pour in a glass of water to keep everything moist when baking. Cover with foil and roast for 40 minutes to an hour on gas mark 6. Once cooked through and cooled, remove the skins of the beetroot.

Now blend the vegetables with a pint of chicken or vegetable stock. I make mine from leftover roast chicken bones, but Alders butchers will sell you some bones for £1 – much better than shop bought stock. Blend everything together until smooth and then gently reheat in saucepan. You may need to add more water if the soups is too thick. Mix a tbsp of horseradish sauce with a tbsp of natural yoghurt and stir into the soup before eating. Hearty, warming and beautifully pink!

Budget?
Stock = £1
Beetroot = 90p
Carrots = 30p
Garlic & herbs = 10p
Horseradish and yog – 20p

Total = £2.50 for 4 (63p per portion)

Millet Salad (43p a portion)

Millet saladI’ve been experimenting with Millet recently. While millet has been used primarily for birdseed and livestock fodder in Europe, it is now gaining popularity as a delicious and nutritious grain that has gained in popularity because it is naturally gluten-free.  It’s good for making creamy like mashed potatoes or fluffy like rice, and goes well with many types of food. It’s got a cous cous or quinoa like quality and is a very versatile grain – excellent for making porridge, salads and even cereal breakfast bars as I’ve just discovered. It’s also good source of some very important bone nutrients, including copper, manganese, phosphorus, and magnesium.

It’s also remarkably cheap coming in at about £2.50 kg. Not as cheap as cous cous but much more nutritious! I made a large batch up last week and we’ve been eating it for lunch sprinkled with sprouted chickpeas and salad. Here’s the recipe –

Weigh out 200g (1 cup) of dried millet. In a large, dry saucepan, toast the raw millet over medium heat for 4-5 minutes or until it turns a rich golden brown and the grains become fragrant. Don’t let it burn. Add 2 cups of water and a pinch of salt, give it a good stir and bring to the boil. Simmer with the lid on until all the water is absorbed (about 15 minutes). Switch off the heat and let the millet stand and steam for 10 minutes – this way all the water is absorbed and the grain becomes lovely and fluffy.

Millet (like cous cous) is very versatile, so it’s a perfect way to get rid of leftover veg. I used cucumber, tomato, some grated red cabbage, fresh herbs and sprouted chickpeas and seasoned with salt, pepper, lemon juice and olive oil. It would be delicious with some crumbled feta and toasted nuts and seeds too!

Budget?

200g millet = 50p
Herbs = from the garden
Lemon, olive oil, salt & pepper = 20p
Vegetables & chickpeas = £1

Total = £1.70 for 4 (43p per portion)


Food waste soup!

Having met Anna Pitt at Sesi Wholefoods on Monday, I’ve been experimenting with meal ideas created from food waste. I’ve started taking my food waste bin seriously and delving in to discover new and exciting recipes. Many important vitamins and minerals are thrown away when you peel and trim vegetables as most of the nutrients lie just under the skin. If you have to peel instead of just a good scrub, you can save these peelings for use later on.

Food waste soup ingredientsFor example food waste soup. This is an easy introduction (after potato peeling crisps) to using your leftover peelings and reducing food waste. I cooked a chicken earlier in the week, then used the bones to make the best stock ever. I’ve been saving all my peelings, skins and veggie odds and ends in a Tupperware in the fridge, and today was the moment of truth where I combined everything that would have usually just gone in the bin.

After thoroughly washing my veggie waste (potato and carrot peelings, some onion and garlic skins, celery leaves and spring onion tails), I pressure cooked them in the chicken stock I had made earlier. Then I simply blitzed it all with the hand blender!

Food waste soupThe results weren’t exactly a gastronomical revolution, but perhaps more importantly, a nutritious and hearty Winter soup that would go well with any home made focaccia.

I was pleasantly surprised, a dollop of crème fraiche, natural yoghurt or indulgent cream would bring this soup alive!

As all the ingredients were heading for the bin – this soup could almost be considered FREE!

If you like this recipe check out my orange and lemon peel cake – it’s delicious and passed the kids party test.